Showing posts with label make up. Show all posts

Wednesday, 12 December 2012

vintage make-up

yes, you've guessed it! more videos. enjoy the tutorials that i've ripped off the net for you!


fash'on... BAM!

Friday, 16 November 2012

at what cost(metics)?

over the week, with every post that i write, a recurring question i have is: at what costs? what lengths are people willing to go to in order to achieve the ideal beauty standards. when the targets are achieved, then standards change. just like the ever-changing yardsticks of beauty, cosmetic trends change all the time. word-of-caution before you slap on your next lip colour, do make it a point to find out what you are putting on yourself.

cosmetics (colloquially known as makeup or make-up) are care substances used to enhance the appearance or odor of the human body. they are generally mixtures of chemical compounds, some being derived from natural sources, many being synthetic. in the united states, the food and drug administration (fda) which regulates cosmetics, defines cosmetics as 'intended to be applied to the human body for cleansing, beautifying, promoting attractiveness, or altering the appearance without affecting the body's structure or functions.' this broad definition includes, as well, any material intended for use as a component of a cosmetic product. 

not meant to scare you but here are some of the disadvantages of makeup:

allergic reactions: one of the most common problems experienced with makeup is an allergic reaction. in many cases, a person doesn't know they are allergic to the makeup until after using it with adverse results. the chemicals can cause rashes, acne, itching or dryness, wherever the makeup has been applied. the reaction can be nearly undetectable to quite severe. allergies can be determined by visiting a physician and completing a 'patch test'. during the test, the doctor applies certain chemicals to a small area of the skin then waits for a few days to see what reaction, if any, occurs. once an allergy becomes apparent, consumers can avoid makeups that contain the problem chemical.

acne: certain makeups clog pores more than others. liquid or cream makeups clog pores the most, while powder makeups and especially mineral makeup tend to leave skin a little clearer. when heavier makeup gets into the pores of the skin, it can be difficult to fully wash all the makeup away before going to sleep. when makeup is left in the pores, it attracts dirt and oil, which in turn combine to create blackheads. blackheads basically consist of dirt that has gotten stuck within the skin, and they are often visible and can be removed. after a while, the blackhead will turn into a full blown blemish, which is an small bacterial infection. these do not last forever and can be 'extracted' from the skin, but they can quite painful. many people try to cover up blemishes with more makeup, which can actually make the problem worse by attracting more oil or dirt to the inflamed skin. in order to avoid this, it is best to find a makeup with washes off easily and possibly contains some antibacterial ingredients.

cancer: even though there has been a dramatic increase in the creation of 'natural' or 'organic' makeup products, there are still many brands that use potentially dangerous chemicals in the creation of their lines. not all the ingredients in each product are tested for long-term safety and although they are tested to make certain that there will be no immediate harmful results, some chemicals have been linked to cancer. it is rare, however, for the millions of people that use makeup daily, the risk increases. chemicals like amorphous hydrated silica have been shown to contain small amounts of crystalline quartz, which has been linked to the development of cancer. chemicals like this are absorbed through the skin, and also breathed in, bringing the toxins to the lungs.
in conclusion, do take care of your skin... after all, it is the largest organ of the body.

fash'on... BAM!

Friday, 2 November 2012

@dd it: cat eyes

yay! it's that time of the week again. somehow, i always feel happy when i write the trending post. maybe because i know that it's the end of the week. i love the weekends because it's the time for me to just let loose and leave writing aside for a moment. but before that, something to add your fashion collection! 

Angelina Jolie

since this week has been all about animals, we shall trend something animal-related. nope it is not going to be fur, simply because i am still undecided about my stance on it. instead, i am going to promote a style of makeup: the 'cat eye'.

Beyonce

my first encounter of the 'cat eye' was with a friend who loves cats and i thought that the cat eye was nice in elongating the shape of the eye. it was somewhat of a femme fatale for me. cat eye makeup can give you a stylish look, suitable for every occasion, whether it is a party, business dinner, or usual weekday.

Rihanna

as with most posts on makeup, here's a video that helps you achieve the cat eye of rihanna and angelina jolie.


if you need more ideas, here are twenty-one ways to wear cat eye makeup, straight from fall 2012 fashion week.

fash'on... BAM!

Friday, 26 October 2012

the goths

YES! it's finally here. the long-awaited post on gothic fashion. before i overwhelm you with images and a full fashion show, it's only fair that we learn of the origins of the gothic movement. 

the goth subculture is a contemporary subculture found in many countries. it began in england during the early 1980s in the gothic rockscene, an offshoot of the post-punk genre. the goth subculture has survived much longer than others of the same era, and has continued to diversify. tts imagery and cultural proclivities indicate influences from the 19th century gothic literature along with horror films and to a lesser extent the bdsm culture.
typical gothic fashion includes a pale complexion with colored black hair, black lips and black clothes. both male and female goths wear darkeyeliner and dark fingernails. styles are often borrowed from the punks, victorians and elizabethans. bdsm imagery and paraphernalia are also common.

in 1977, karl lagerfeld hosted the soirée moratoire noire party, specifying "tragique exigée absolument noire" (totally black tragic dress required). the event included elements associated with leatherman style.

goth fashion has a reciprocal relationship with the fashion world. in the later part of the first decade of the 21st century, designers such as alexander mcqueen, rick owens, gareth pugh, ann demeulemeester, rodarte, hedi slimane, john richmond, john galliano, olivier theyskens and yohji yamamoto brought elements of goth to runways. 
this was described as 'haute goth' by cintra wilson in the new york times. thierry mugler, claude montana, jean-paul gaultier and christian lacroix have also been associated with a gothic style. in Spring 2004, riccardo tisci, jean-paul gaultier, marc jacobs and stefano pilati dressed their models as 'glamorous ghouls dressed in form-fitting suits and coal-tinted cocktail dresses'. swedish designer helena horstedt and jewelry artist hanna hedman also practice a goth aesthetic.


fash'on... BAM!

Thursday, 18 October 2012

pretty scary

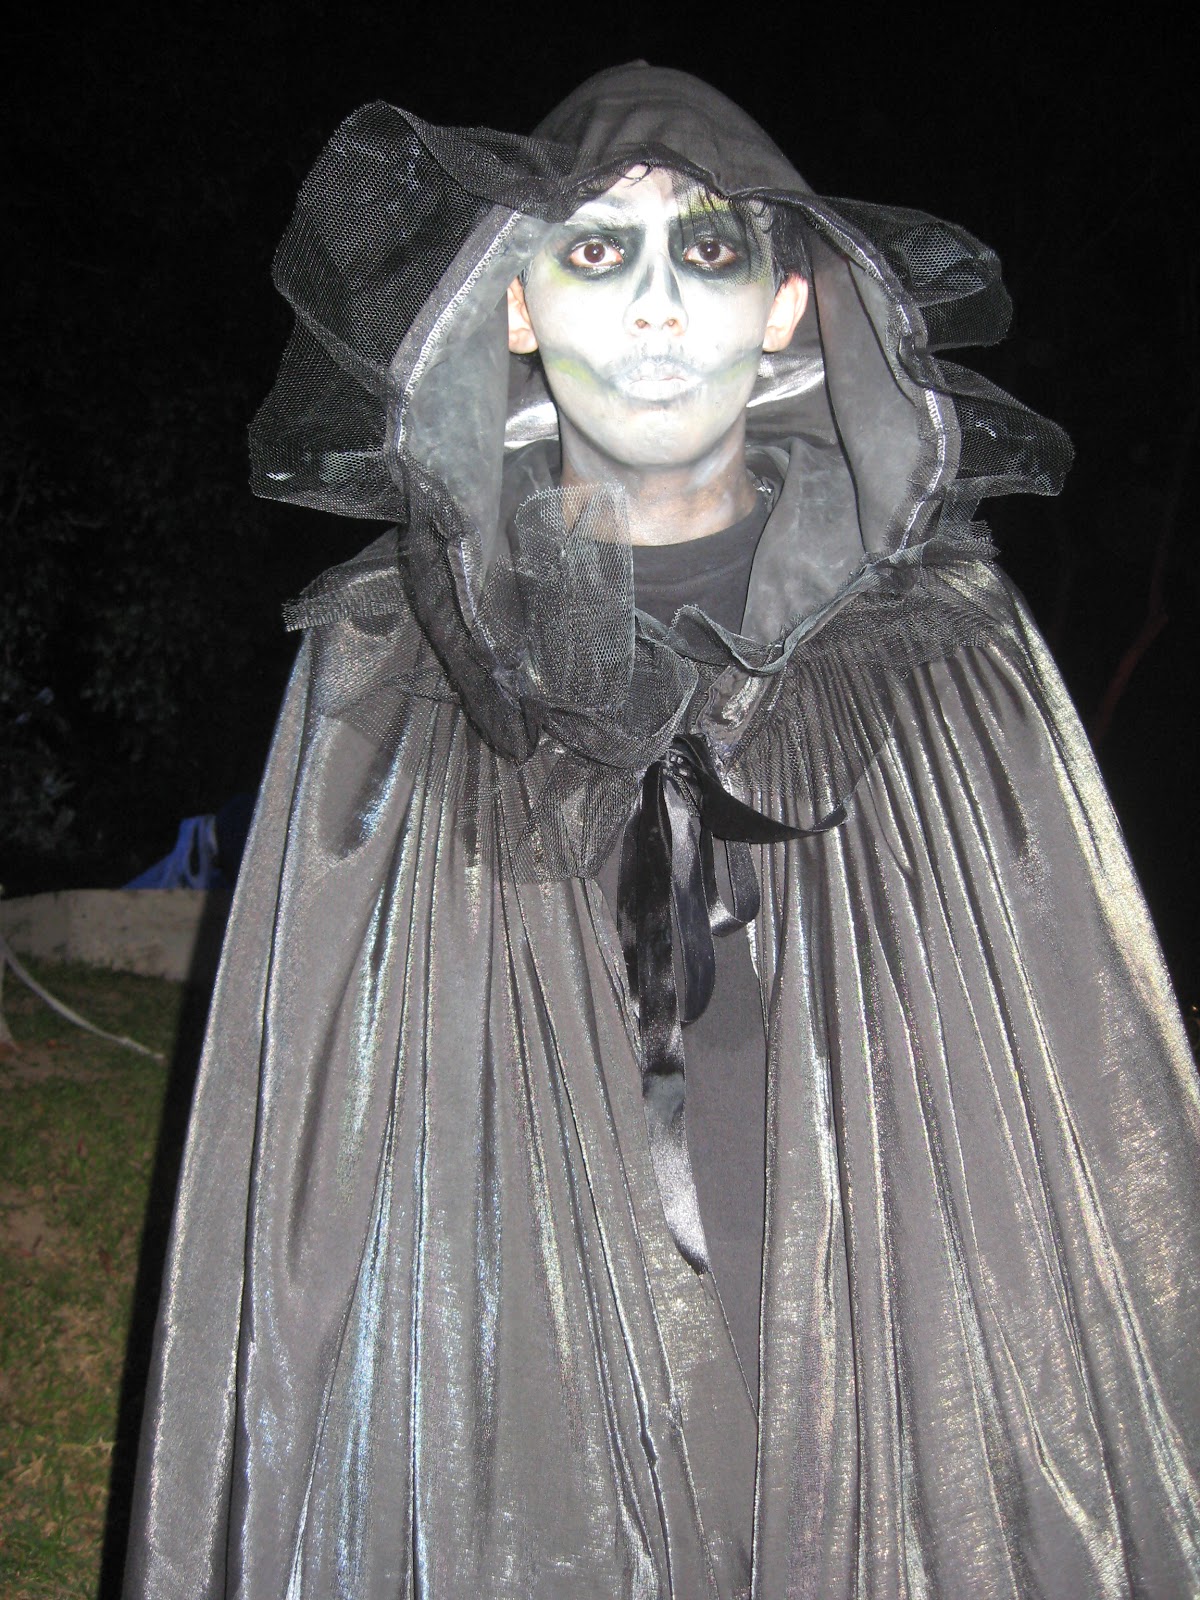
the scary part about theatrical make-up is not the final effect that you are trying to achieve but the process of application. in this case, only practice can make it perfect. for the rest of us, it just becomes a hot mess. hence if you are planning to do something really dramatic, i would seriously advise you to spend a little money and hire a professional to help you in getting the look that you want.

image from bestmakeup.info

however, if you are adventurous enough to try applying your own make-up / face paint, i have a tip for you (this was shared to me by a fellow actor) especially if you sweat buckets. before application of your first layer, apply a thin layer of peel-off masque. of course, you need to stretch out your face when doing that. when it dries, you can apply the makeup over the masque.

picture from favim

this little tip was good in a number of ways:

1) easy removal: because you were essentially painting on the masque, when it's time to be removed, just peel off. the colour does not stain your real skin. the last thing you want is to still have a green glow during christmas (unless you are the grinch).

2) longer lasting: this is a personal thing. compared to application on bare skin, the face paint seems to stick on longer when applied on the layer of masque. i remember having to do only minor touch ups for a good half a day and when it comes to touching up, it was just re-apply the masque then makeup over...

3) smoother application: because you are 'painting' over the masque. it gives a smoother texture and an easier face to work on. 

4) better skin: i totally agree with my fellow actor on this one! instead of having harsh make-up on the face, you are having a daily routine of masque application (we were in a two month production!) instead of emerging with outbreaks, we had much better skin to boost of.

image from fanpop

on a final note, you can also try other types of facial masks to achieve the look that you want for halloween BUT do try it out. under conditions of stress, we usually mess up our own makeups. anyway, another video to help you along.


fash'on... BAM!

pretty bloody

blood is inseparable from halloween. you may want to keep your halloween face blood-free but keeping a vial of 'blood' is always handy when you are suddenly inspired to bring the fun up a notch.

image from themeparks

probably one of my shortest post but i'll share two videos with you (because it's really hard to explain in words). the first is how to make 'blood' at home and the next is how to do the 'bloody' look if you have the time for it.


the problem with fake blood that we use in theatre is the smell. so if you decide to go for a 'bloodly' look, just get someone else to sniff you before you head out. you don't want people to run off for the wrong reason.


fash'on... BAM!

Tuesday, 16 October 2012

spooky mess

no event or production in this world would be perfect. the question is, even when there are flaws, can we accept them and move on? like i promised in my earlier post, i would take this one to talk about things that got under my skin about sentosa spooktacular. after reading this, some of you might say that i am nit-picking and just overly fussy. perhaps i am but i guess, when attention paid to detail, the mileage earned is geometric. just think of the blankets and hot tea that chanel provided during their haute couture show.

so this post is going to be about the little tweaks that can be made to sentosa spooktacular to make the experience truly memorable...

1) getting out of touch with my roots


during any halloween events, there are bound to be the generous usage of wigs. so i would pay attention to the talent's real hair sticking out. this is something that can be easily resolved with hairpins.


see what was wrong? i didn't noticed the bandana during the event because it was dark but in photos, the bandana stood out like a sore thumb. my guess is that the talent was supposed to keep his hat on with the bandana holding up his hair but he took it off and got caught on camera by a fussy blogger.

2) do you see my true colours?


while the hair faux pas were acceptable, i cannot say the same for make-up. one of the biggest rules in the application of make-up is: when putting on foundation, do not end at the jawline. this is even more important when you are creating the illusion of a character. 


compare the two photos (picture on the right is from another halloween event)... one definitely had more attention paid to makeup. notice that you do not see any skin in the picture on the right. you can afford to use a thinner layer when it comes to the neck and body but it is still essential to avoid two distinct skin tones... lots of blending is needed to prevent patches of bare skin (the other way is to apply beyond the costume line.)


next, you will get your best pictures at the beginning of the night because by the later part of the night, most of the make-up on the faces of the talents have faded due to perspiration. i felt bad for the talents because i know how it feels like to have on theatrical make-up in an outdoor event. well, i do have a couple of tips for those of you putting on scary makeup this halloween but i'll share them later in the week.

so my tip for you: if you want to take pictures with the 'spirits' that have elaborate make-up, do it as early as you can... 

3) spot the brand under my costume

generally, the costumes were fantastic and gave a whole list of photo opportunities. but some attention can be paid to what the talents were wearing underneath. there was too much 'sticking out' of tee-shirts for me. it's like 'hey, i know where that is from because i have the same thing in four colours'. the worst part of this undershirt glitch is when one can actually name the brands (and probably the price!)


after all, halloween is the season of creating the ultimate illusion of spirits back to haunt us. i want to be chased by a ghost who wants my soul, not one who is fighting me for the last discounted piece. ghosts were people too but after these people pass on, i would appreciate if we shopped at different stores.

4) land of lost soles

i saved the best for last. after three pointers, i think i'll allow the pictures to do the talking in this one...


not that scary anymore eh?

yes, i'm picky, fussy and every mean word that you can find in the dictionary but here on the online edition, details are important. after all, there is a reason why haute couture is in a class of its own.

fash'on... BAM!

spooky faces

other than taking pictures with all the wandering spirits for the outfits that they are in during any halloween event, another make or break factor is the make up of these characters. many times, a right combination of make up and costume gives the extra oomph factor. so what is there to expect of the make up during sentosa spooktacular? like how the 'fashion' was discussed, expect the same for the make up...

1) the white face


these are a given. not having the white painted faces at a halloween event is like a birthday celebration without the birthday cake. why the obsession with white faces? think of phrases like 'white as a sheet', 'turn pale with fear' and you'll get the literary references. medically, blood is the thing that gives your skin the pinkish and radiant glow. so after a person dies and blood has been drained, the person is 'turns white'. that said, some of the white are too white for me... but i'll explain it my next post. i'll keep this post more objective.

2) the rotten face


another given. these, i must say, are fans favourites. it shows the efforts and prowess of the make-up artist at transforming a human face into something else. the duration of make-up is usually an hour and a half or upwards. i always give a distinction to both talents and artists for executing this look perfectly. these are the real scary faces. by the way, i'm not certain if it was deliberate but the dead soldier had flaps of skin flaking off the neck area as well. let's just assume that it was meant to be that way.

hence when you do visit sentosa spooktacular, do take pictures with these faces. if possible, do close-ups with them. just be mindful not to touch their faces by accident. their make-up is sure to stain (careful as i was, i did find make-up on my hoodie when i got home.) 

3) the covered face


i'm mixed about this group. the mask in the centre worked for me (it was in the doll house so it suited the theme) but the other two, i'm divided, divided not due to the poor make-up. in fact i thought the make up was brilliant, like the veins on the face of the last picture but i got those shots after much hunting. 

for the first, that was the best shot i got out of three. i was trying so hard to keep the hair up and in the end i gave up. (tip: do a group shot if you spot her, get the bravest one amongst the lot to hold her hair up) the hair just kept blocking the face, so when this old lady pops up in front of you, the scare factor is weakened because the hair is in the way of the face.

the third picture was taken when i went under the straw hat to see the face. it was a great pity because this was, and still is, one of my favourite spooky face. it had a right balance of every element that makes a face scary. i won't tell you where to find this man but look out for the straw hat. it's going to take a lot of convincing on your part (i had my way because of the media pass) to get him to pose for a picture.

my take for these looks: you need do hunt them out to get the shots (that is if they don't spook you first!)

4) the human face


no surprises from this group. basically it uses your own face as the basis, after which, you add on an element of spook to it. in terms of scare factor, it's much lower but it works as well. i mean, too much rotting flesh can smell. so if the rotting flesh look was the strong, pungent durian, this would be the sweet nectarine.

the dashing gentleman is just there for show. he's not at all scary, pretty friendly guy. he's placed there because if you see him, you are in for a good time. (yes, every pun intended. haha) i had the most fun on the trail he was stationed but i won't give it away though most other bloggers would have revealed it anyway. all in all, as you go through all five different trails of sentosa spooktacular, do take time to look at the make-up of the 'ghosts'.

fash'on... BAM!

Thursday, 11 October 2012

five make-up tips

yay! finally, the online edition has something about make up. i've always wanted to do features on things related to make up but never got round to gathering material for it. anyway, i do use make up (not so much now) but when i was still active in theatre. i remember those days when i had to apply a full face of make up in the car while traveling, oh those were the days. before i whip out the kleenex and start tearing up, these are five make up tips for you.

1) a stippling brush is used for the application of foundation onto the skin for a more airbrushed finish. the bristles need to be stiff in order to hold up to the foundation and not streak. 

image from makeupminutes

2) have a contour brush to apply darker powder under the cheekbones to create dimensions on the face. contours aim at making the cheekbones stand out and the face slimmer. 

contour brushes from MAC

3) the flat stiff brush is used to pack on colour to the eyelid. it needs to be flat so that you can pat on the eyeshadow and it needs to be stiff so that it picks up plenty of colour.

flat stiff brush featured by machachai

4) dome brushes (stiff and soft) help to create smoky effects and blends. 

dome brushes featured by raesin images

5) do get a lip brush too. it helps in application and definition of lips. my personal recommendation would be one that is firm with a tapered tip.

retractable lip brush

i hope you realised by now that it's not the how-to tips that i'm talking about (that will come eventually) but this post is about the tips of the brushes hence make-up tips (geddit geddit?)... hehe.

fash'on... BAM!